In whole-house custom cabinetry, the shoe cabinet is the first cabinet you'll use daily – and the most likely to have its design details overlooked.
Many homeowners only realize after moving in: shoes don't fit, shelf spacing is all wrong, and there are always shoes scattered at the entrance. What's worse – the more shelves you have, the more material it costs. Some suppliers intentionally space shelves wider apart to save on materials, leaving you with a shoe cabinet that looks good but barely holds anything.
Here's a quick guide to get your shoe cabinet design right.
Wide shelf spacing is the most common mistake. A typical flat shoe is about 10cm tall, sneakers around 15cm, and ankle boots around 20cm. If your shelf spacing is 30-35cm, you're wasting more than half the vertical space.
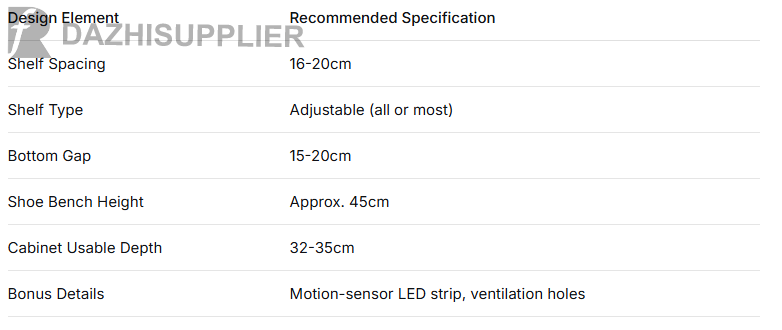
✅ The right way: Keep shelf spacing at 16-20cm – this fits most shoe types. For high heels, consider tilted shelves to save space.
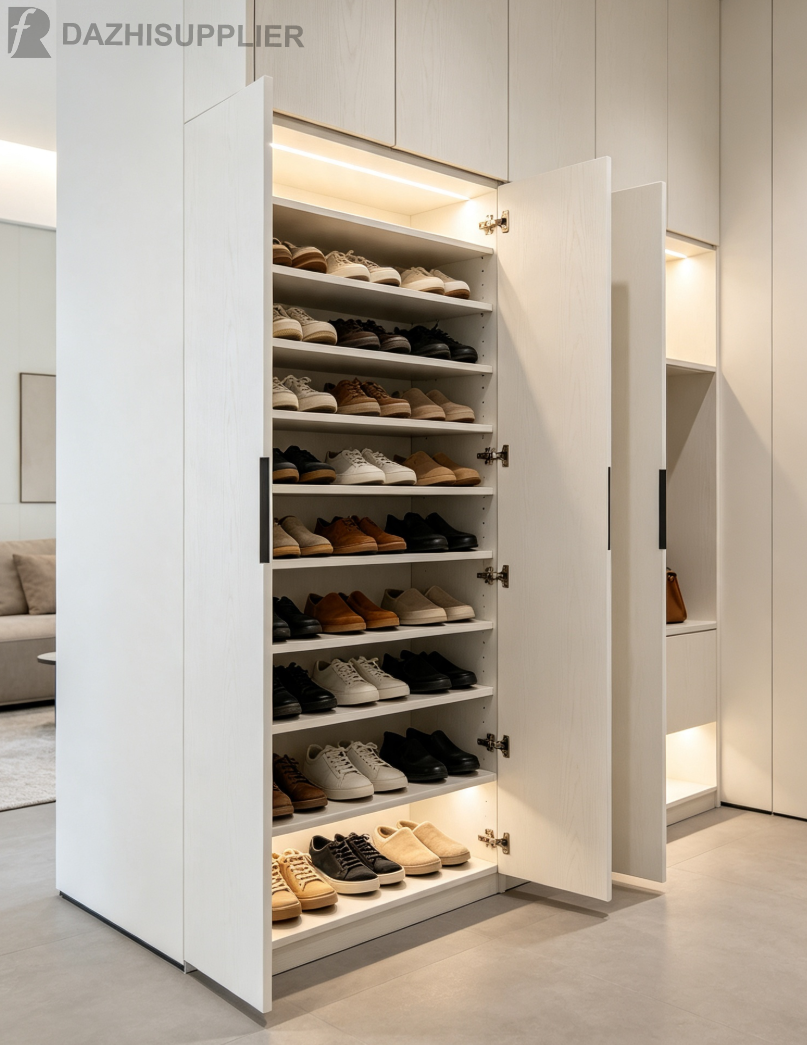
⚠️ Important: Confirm the number of shelves and their spacing before signing the contract. Some suppliers purposely space shelves wide to save material, then charge you extra later for adding more – confirm upfront and avoid the trap.
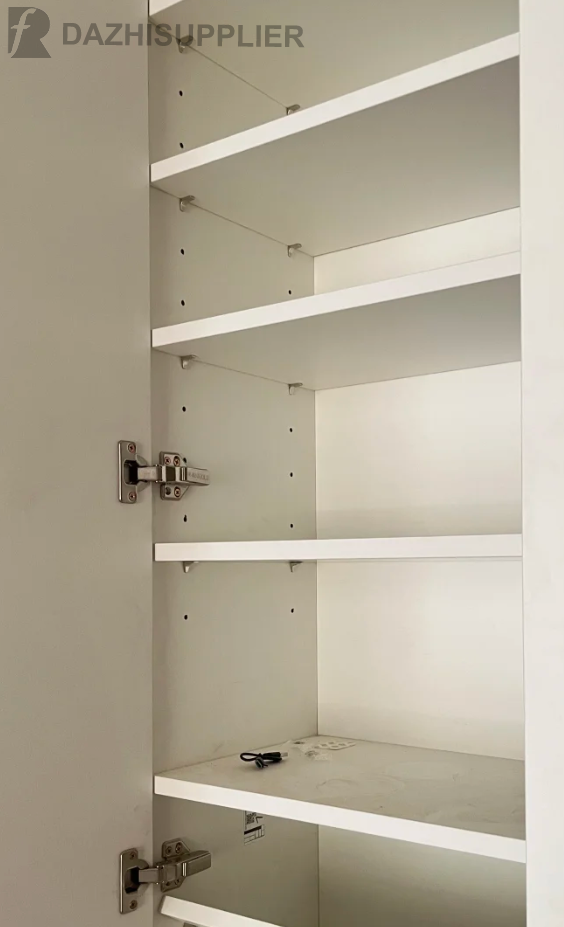
Adjustable shelves are far more practical than fixed ones. Today you love heels, tomorrow you might prefer sneakers. Adjustable shelves let you change heights anytime – no extra cost to modify the cabinet later.
✅ The right way: Make all shoe cabinet shelves adjustable – especially in boot areas.
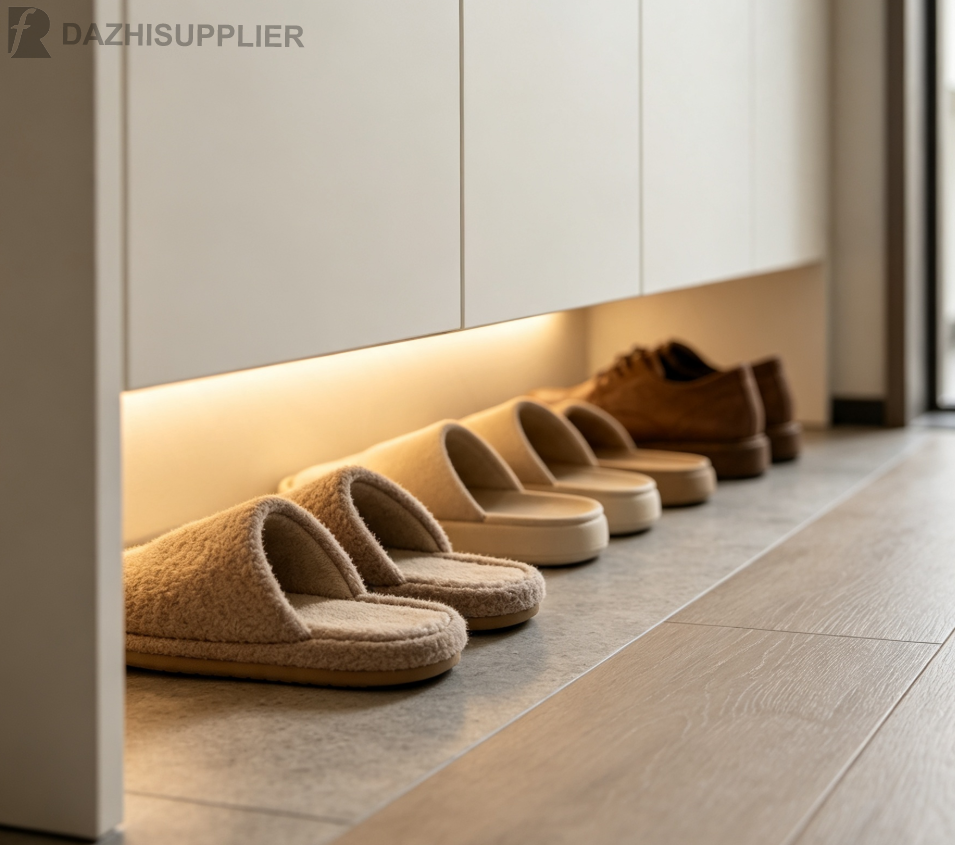
Leaving a 15-20cm gap at the bottom of your shoe cabinet is a game-changer. Kick off your shoes when you come home, slip them on when you leave – no opening doors, no bending down. It's the little convenience that makes a big difference.
✅ The right way: A floating bottom design for daily-wear shoes and slippers. If your budget allows, add a motion-sensor LED strip – no more fumbling for slippers in the dark.
If space allows, include a built-in shoe bench. Sitting down to change shoes is a blessing for seniors, kids, and pregnant family members. Add a hanging area above the bench for coats and bags – no more dumping them on the sofa.
✅ The right way: Bench height at about 45cm, with an open shelf underneath for slippers. Install a row of hooks or an open hanging rack above.
The usable depth of a shoe cabinet is generally 32-35cm (including the back panel). Men's shoes are about 30cm long. If the depth is insufficient, shoes have to be stored vertically or at an angle – drastically reducing capacity.
✅ The right way: Confirm the usable depth during measurement. If your entryway is tight, ask your designer for the minimum possible depth that still works.
One Last Word
The shoe cabinet may not be the biggest piece of furniture, but it's used every single day. Get it right, and you'll breeze in and out. Get it wrong, and you'll be bending over and hunting for shoes for the next ten years.
As a one-stop whole-home customization provider, we evaluate your entryway dimensions, family size, and footwear types during the measurement phase to plan the optimal shelf count, spacing, and functional zones – all confirmed before production, so you have no regrets after moving in.
Planning a custom project? Contact us for a free, personalized shoe cabinet design tailored to your home.
Contact: Cherry Fang
Phone: +86 136 2007 7702
E-mail: info@dazhisupplier.com
Whatsapp:8613620077702
Add: 748 Houjie Town, Dongguan City, China, 523000
We chat