Many homeowners add light strips to their custom cabinets to enhance ambiance and functionality. But after installation, they often find: the lights are on, yet the areas that need illumination remain dark. What went wrong? The light strip was placed in the wrong position.
The placement of light strips inside cabinets roughly falls into three categories, with vastly different lighting effects:
| Light Strip Position | Lighting Effect | Visual Effect |
|---|---|---|
| Front (near the door) | Light hits the inner side of the door; the back of the cabinet stays dark | Creates a "see the light, not the source" atmospheric glow |
| Center | Light spreads evenly, illuminating most areas | No strong shadows or highlights – functional but flat |
| Back (near the back panel) | Light directly hits stored items, making them easy to see | Clear silhouettes – excellent for display purposes |
Conclusion: Front placement works best for ambient cabinets (display cases, wine cabinets). Back placement works best for functional cabinets (wardrobes, kitchen cabinets, shoe cabinets). Center placement offers a compromise but excels at neither.
Wardrobes: Place the light strip toward the back. Light falls directly on the front of hanging clothes, making them easy to spot. One strip in the hanging section and one in the shelf section is usually sufficient.
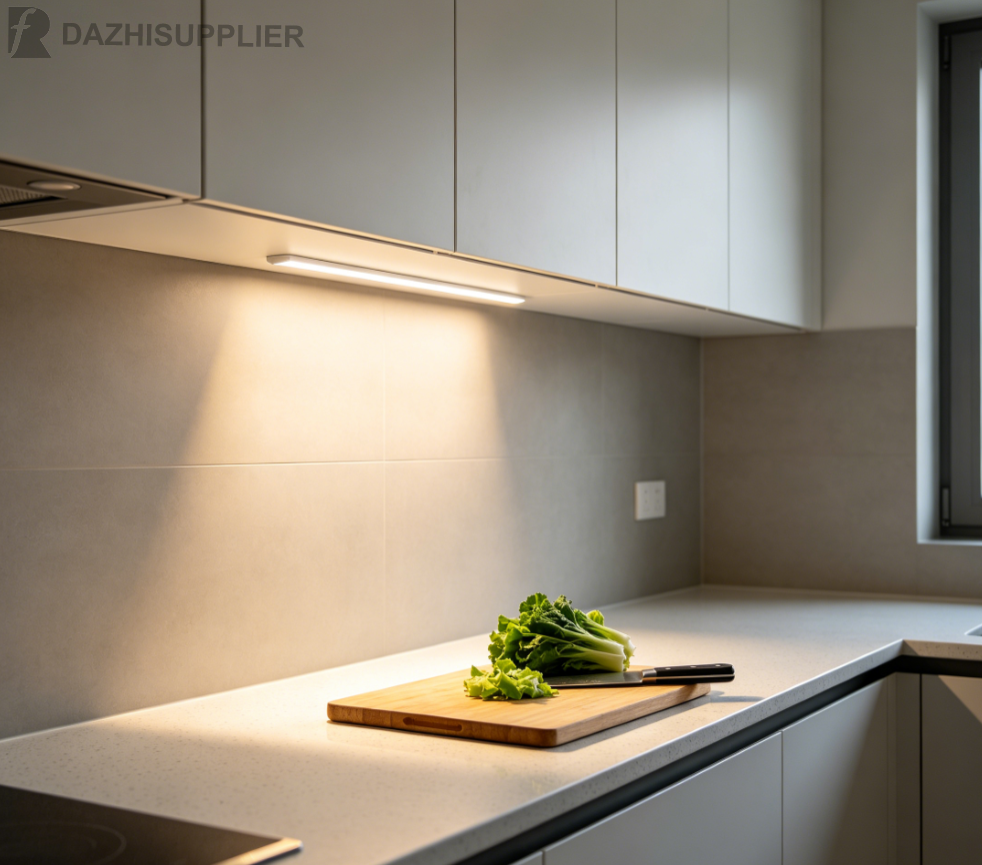
Kitchen Wall Cabinets: Place the light strip toward the front (near the door edge). Light shines down onto the countertop – no more chopping in your own shadow.
Display Cases / Wine Cabinets: Place the light strip toward the back. Light illuminates items from behind, creating the best showcase effect and a premium look.
Shoe Cabinet Open Shelves: Place the light strip toward the front or center. Even lighting makes the countertop look great for keys, bags, and decorative items.
Beyond placement, the control method directly impacts daily usability:
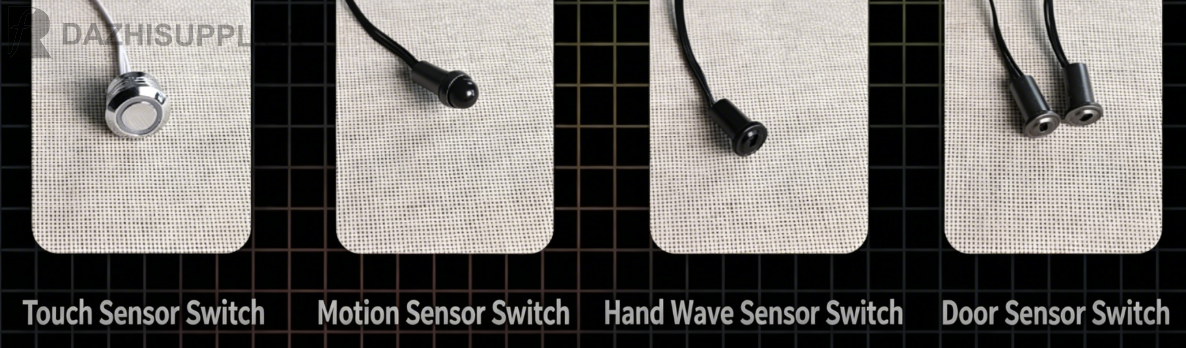
Motion sensor: Turns on when opened, off when closed – the most practical choice for wardrobes and shoe cabinets
Dedicated switch: On when you want, off when you don't – great for display cabinets
Integrated with main lighting: Requires pre-routed wiring – must be planned during the electrical rough-in phase
Note: The power cord and driver/transformer need dedicated space. Plan this during the electrical rough-in phase – retrofitting later means exposed wires or dismantling cabinets, both of which are costly and disruptive.
Which shelf gets the light strip? Front, center, or back?
Which control method? Motion sensor, dedicated switch, or integrated with main lights?
How will the power cable run? Where will the driver/transformer be hidden?
Ask your designer to mark the light strip positions and wiring plan clearly on the drawings. Confirm everything before placing the order – don't end up with lights that "shine in the wrong place."
Cabinet lighting isn't about "just having lights." Getting the placement right is what makes them truly useful. For function-first cabinets, place light strips toward the back. For ambiance-first cabinets, place them toward the front. Confirm the details with your designer upfront, and your light strips won't go to waste.
Planning a custom project? Contact us. We'll design a comprehensive cabinet lighting plan for your entire home during the design phase.
Contact: Cherry Fang
Phone: +86 136 2007 7702
E-mail: info@dazhisupplier.com
Whatsapp:8613620077702
Add: 748 Houjie Town, Dongguan City, China, 523000
We chat